The ERC is small PCB consisting of relays and a ATmega micro controller to monitor the rotator feedback voltage and operate the relays taking on the role of the existing CW and CCW switches.
The controller is available in a number of configurations, I choose to purchase the Version 4 USB controller as most PC's today do not come with a built in serial port.
The controller is available as either a kit or prebuilt. I decided to get the kit form, as any respecting amateur would, for £79.47 including postage and packing which is a £20 pound saving on the prebuilt unit.
The kit comes in four packages consisting of a high quality USB cable, software CD, component bag and another bag with the PCB, DC power connector and some cable to wire the ERC up to your existing controller.
 |
| Contents of ERC kit package. |
The component bag consists of all the components to be soldered onto the supplied PCB.
 |
| The supplied kit components. |
 |
| PCB, DC power plug, cable and PCB standoffs. |
The kit has very few parts as you would expect based around a ATMega 328P 8 Bit micro controller, a crystal for the processor clock some capacitors, a couple of diodes and chokes, a few resistors and a small 70cm x 60cm PCB plus the USB interface, relays and terminal blocks.
I started by first installing all the discrete components, IC holders and the USB interface board which took about half an hour to complete.
 |
| The completed board minus relays and terminals. |
 |
| The completed board ready for the IC's to be fitted. |
Once the board is completed you apply 12V DC to the unit and test that you get 12V and 5V at the test points located on the DC port side of the board assuming these pan out you insert the ICs and then start modifying the original rotator controller to take the ERC board.
With the easy bit completed the next job is to disassemble the Yaesu controller and do some metalworking.
Taking the Yaesu controller unit apart isn't a five minute job what you need to do is unplug the power cable from the front power switch and then pop out the cable clamp and remove the lead from the case, you next need to desolder the fuse holder from the transformer and remove holder from the chassis again this isn't easy as everything is covered in blue thread lock, next up remove the control cable 6 pin molex socket. With all the cables removed you now need to remove screws holding the top instrumentation tray to the front and back panels, this is done to allow access to the nuts and bolts holding the mains transformer to the bottom of the chassis which again has blue lock thread, Yaesu really don't want this unit to fall apart. ;-) With all the above removed you can now get on with marking the holes from the DC PWR and USB ports.
There's a handy sticky label template that comes with the ERC controller which is perfect for marking the hole placements.
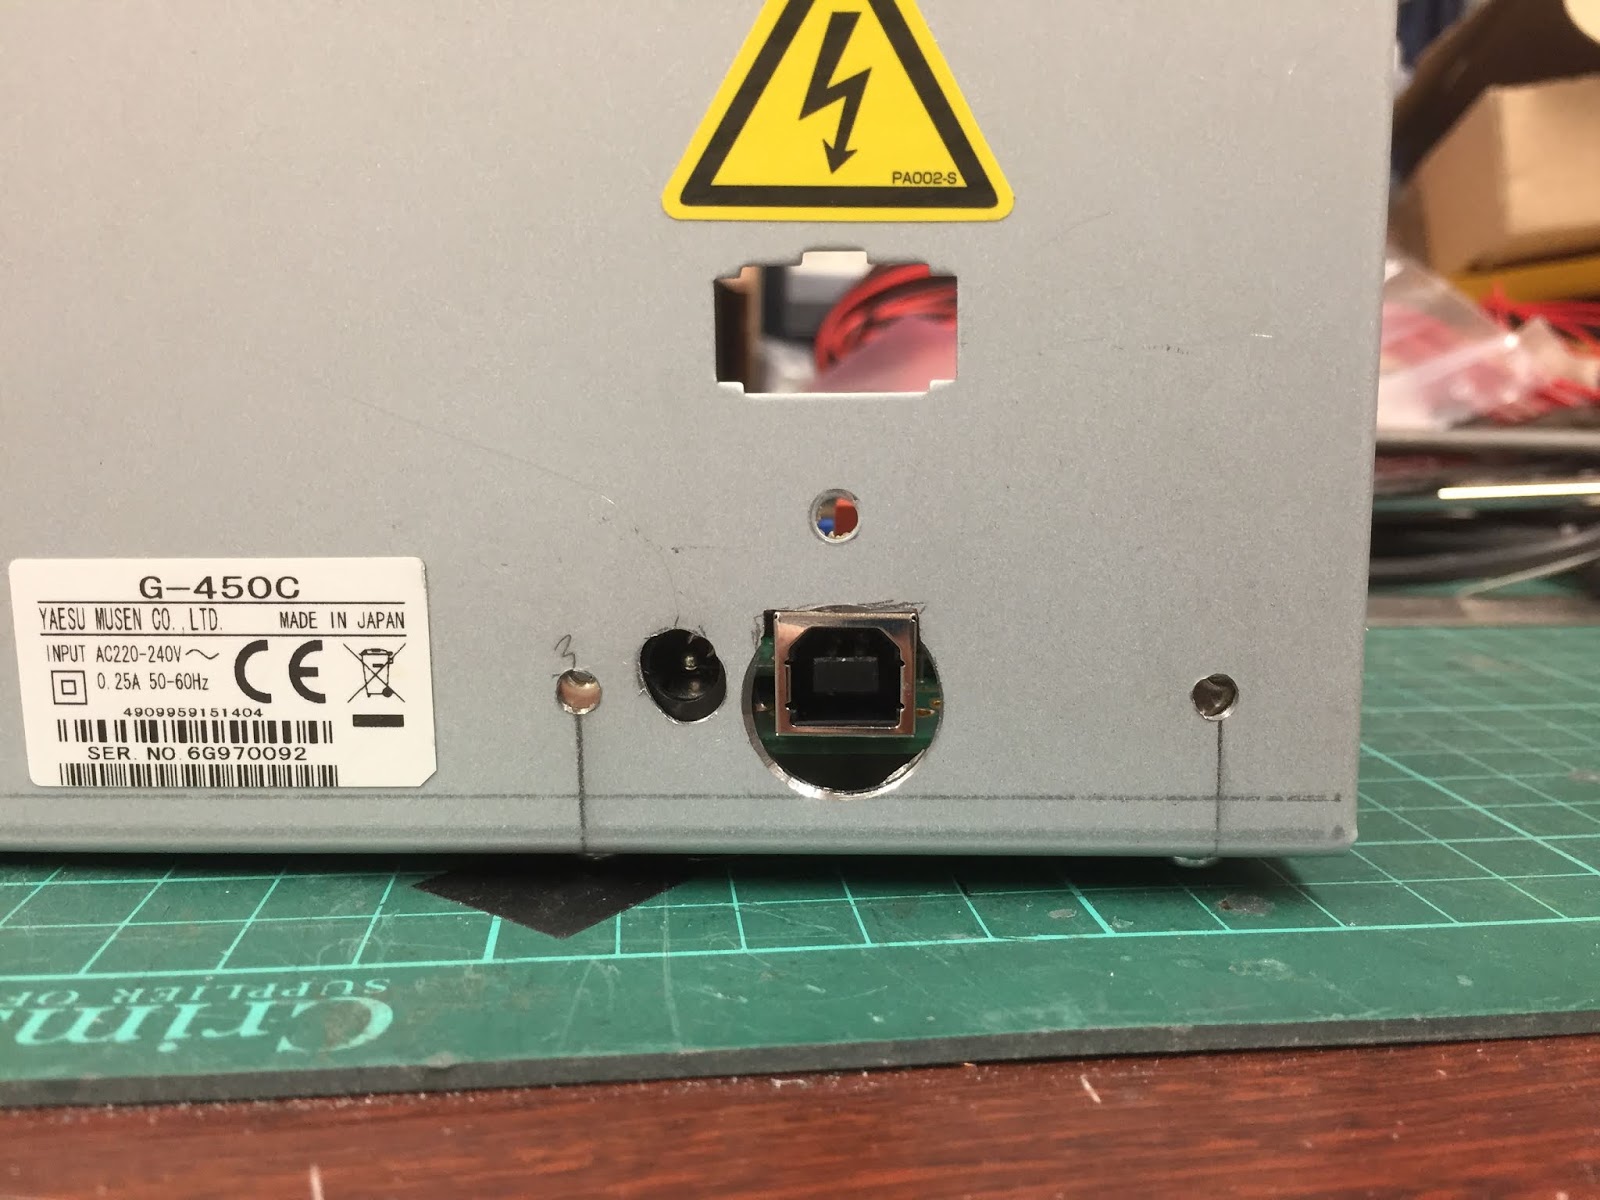 |
| The rear of the controller box with the holes cut for the DC power and USB connector. |
Now you can see from the above picture the holes didn't quite align horizontally and this was down to me being a wally and instead of adding a couple of millimetres to the template I did the opposite and removed a couple of millimetres instead, so had I carried out that operation successfully everything would have aligned. I still ended up with yet another problem shown below.
 |
| ERC fitted within the original rotator controller. |
 |
| The original rotator gubbins replaced and the ERC cables attached. |
 |
| The control button side of the controller. |
With the ERC controller connected you can refit the outer case and reconnect the unit the rotator and plug the controller back into the mains and station DC power supply you can then move on to calibrating the unit.
On the software CD you'll find two pieces of software one to calibrate the unit and another to control the unit with.
The calibration is a little bit more involved for the Yaesu G450C rotator in that you need to do an extended calibration. This involves calibrating at more headings than would be normal. The general gist of the procedure is to start the calibration software as shown below.
Once the rotator control software has started remember to set the com port and wait few moments for the software to connect. Now click on a point on the compass and the rotator should start to turn to the position you selected and check the Yaesu controller agrees with the software, try this a few times to confirm the calibration if the calibration is off you'll need to repeat the calibration again.
Though the supplied software is ok it's very basic and in fact I replaced with PstRotator from YO3DMU it's an excellent piece of software and though you need to pay 20 Euro's for the licence it's a bargain and I wouldn't use anything else. The software can set with presets for quick heading changes, you can open a map and click at any point and the beam moves to that head, the other nice feature if you live near the coast is have the beams turn into the wind when the wind speed exceeds a threshold of you choice.
This is one of those projects that starts off as a 'nice to have' which turns into 'how did I ever manage without it' I'm sure no one would regret adding the ERC to their rotator controller.
On the software CD you'll find two pieces of software one to calibrate the unit and another to control the unit with.
The calibration is a little bit more involved for the Yaesu G450C rotator in that you need to do an extended calibration. This involves calibrating at more headings than would be normal. The general gist of the procedure is to start the calibration software as shown below.
 |
| Calibration Software |
Once you have set the controllers com port, which you find in the Windows device manager, you'll be able to read the ERC memory. Next you need to set the rotator fully counter clockwise, using the Yaesu controller, once set to 0 degrees you can perform an extended calibration by using the "Extended 1" function which measures the rotator feedback voltage at 30 degrees intervals once each interval has been measured the software will tell you to advance to the next calibration point.
A point to be aware of is make sure when you are setting the Yaesu controller that you look straight on to the Yaesu controller heading indicator otherwise you can calibrate to the wrong heading.
Once the calibration has been completed close the calibration software and start the rotator control software shown below.
 |
| The control software supplied with the kit. |
Though the supplied software is ok it's very basic and in fact I replaced with PstRotator from YO3DMU it's an excellent piece of software and though you need to pay 20 Euro's for the licence it's a bargain and I wouldn't use anything else. The software can set with presets for quick heading changes, you can open a map and click at any point and the beam moves to that head, the other nice feature if you live near the coast is have the beams turn into the wind when the wind speed exceeds a threshold of you choice.
 |
| PstRotator |
nice report ive just purchased one wired it installed both peices of software, clicked on device manager ERC using com 6 , however half way through extended 1 calibration get messege no comport 6 although it still shows in device manager did you have any issues at the moment i cant calibrate many thanks steve
ReplyDeleteHi. Can i ask you about some more info how to connect with 450C . Its not clear enought for me
ReplyDeleteGreat article. Appreciate the fact you included decent photos of the install. Does the ERC come with specific instructions on what wires to connect to etc...? Thanks -Theo, VK5IR.
ReplyDeleteHello,
ReplyDeleteI am trying to wire up my ERC-4 USB to my YAESU G-450A, but am a little confused on which "solder blobs" I connect up to for the left and right switches. Can you please send me a picture of which points I need to tap into?
And I'm going to need to buy more wire. Is AWG20 sufficient?